This is one of the simplest and most essential Arduino projects—blinking an LED. It introduces beginners to the basic concepts of electronics and programming using Arduino. In this project, we connect an LED to the Arduino and write a simple program to turn it on and off at regular intervals. This helps new users become familiar with writing and uploading code, working with digital pins, and understanding timing functions in Arduino.
By completing this project, you’ll learn how to:
- Build a basic electronic circuit on a breadboard.
- Control an LED using digital output.
- Use fundamental Arduino functions like
setup(),loop(),pinMode(),digitalWrite(), anddelay().
This foundational knowledge is essential for diving into more advanced projects involving sensors, motors, and displays.
Components
- Arduino Uno (or compatible)
- LED (any color)
- 220-ohm Resistor
- Breadboard
- Jumper Wires
- As needed
- USB Cable (for Arduino)
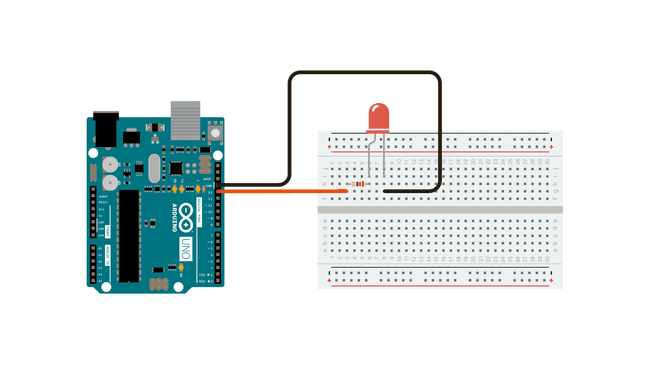
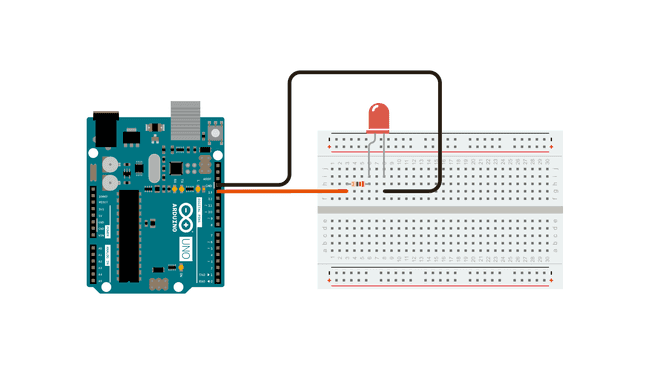
Circuit Diagram:
LED Anode (long leg) → Arduino Pin 13 (through 220-ohm resistor)
LED Cathode (short leg) → Arduino GND
What You’ll Learn?
- How to set up a simple LED circuit on a breadboard
- How to write and upload code to an Arduino board
- Understanding basic functions:
pinMode(),digitalWrite(),delay()
Try This Next:
- Change the delay time to speed up or slow down the blinking.
- Use a different pin, like pin 7 or 9, and update the code.
- Add a push button to control the LED manually (more on that in future posts).